To add ROMs to an iPhone emulator, copy backups of games you own into the Files app — through iCloud Drive, AirDrop from a Mac, or a USB cable from your computer — then open the emulator, tap Import, and select the files. App Store emulators like GamePod Emu never include games; you supply your own. Once imported, GamePod detects each game, files it under the right console, adds cover art to your library, and turns on save states and auto-save immediately. The whole import takes about two minutes, and you can add many files in one batch.
How Do You Add ROMs to an Emulator on iPhone?
Every iPhone emulator follows the same three-stage pattern, whether you use GamePod, Delta, or RetroArch. First, you create or locate backups of games you legally own. Second, you move those files onto your device so they are visible in Apple's Files app. Third, you add the games to the emulator via the Files app import dialog inside the emulator itself.
Stage two is where most people stall, because it is the only part that involves anything outside the emulator. The good news: iOS has quietly become very good at file handling. The Files app can see iCloud Drive, folders synced from a computer, AirDropped files, and third-party storage providers — so once your backups exist anywhere in that ecosystem, the emulator can reach them. The sections below cover each transfer route in detail.
How Do You Legally Get ROMs? Dump Your Own Cartridges and Discs
The clean way to build a ROM collection is to dump your own game cartridges and discs — that is, create digital backups of the physical games sitting on your shelf. Inexpensive USB cartridge dumpers exist for Game Boy, GBA, DS, NES, SNES, N64, and Genesis carts: plug the cartridge in, connect the dumper to your computer, and it reads the chip into a file. For disc-based systems like PS1 and GameCube, a computer disc drive plus ripping software produces an image of a disc you own.
What you should not do is grab copyrighted games from ROM-download websites. Distributing those files is infringement, downloading games you never bought is infringement in most jurisdictions, and the files themselves are a common malware vector. This guide will never link to such sites, and neither does GamePod. If you want the full legal picture — what courts have said about emulators, backups, and format-shifting — our emulator legality guide lays it out plainly.
Which File Formats Do iPhone Emulators Accept?
Each console has one or two standard file extensions, and dumping hardware produces these formats by default. The common ones across the twelve systems GamePod supports:
- Handhelds: .gb (Game Boy), .gbc (Game Boy Color), .gba (Game Boy Advance), .nds (Nintendo DS), .3ds (3DS), .iso or .cso (PSP)
- Cartridge consoles: .nes (NES), .sfc or .smc (SNES), .z64 or .n64 (Nintendo 64), .md, .gen, or .bin (Sega Genesis)
- Disc consoles: .bin with .cue, or .chd (PlayStation 1); .iso or .rvz (GameCube)
Two practical tips. For PS1, keep a .bin and its matching .cue file together, or use a single .chd file, which bundles everything and saves space. And if a dump arrives as a .zip archive, check whether your emulator reads it directly — when in doubt, extract the archive in the Files app first (long-press the file, then tap Uncompress) and import the bare game file.
How Do You Transfer ROMs via the Files App, iCloud, AirDrop, or USB?
Pick whichever route matches where your backups currently live:
iCloud Drive (easiest from any computer). Drop your files into a folder in iCloud Drive — from a Mac's Finder, from iCloud for Windows, or through iCloud.com in a browser. They appear in the Files app on your iPhone automatically. Tip: tap and hold a file and choose Download Now before importing, so it is stored locally.
AirDrop (fastest from a Mac). Select the files on your Mac, right-click, choose Share › AirDrop, and pick your iPhone. On the phone, choose to save the incoming files to Files. They land in the Downloads folder or in "On My iPhone."
USB cable (best for big libraries). Connect your iPhone to a computer, open Finder (macOS) or the Apple Devices app / iTunes (Windows), select your device, and use the Files tab to drag files into the emulator's folder — or simply copy them into an iCloud folder over the cable. Large PSP and GameCube images move much faster over a wire than over Wi-Fi.
However the files arrive, the end state is identical: they are visible in the Files app, which is exactly where an emulator's import dialog looks. That is the whole trick to how you import ROMs to an emulator on iPhone — there is no special sync software, no jailbreak, and no computer-side companion app required.

How Do Save States and Auto-Save Work After Importing?
The moment a game enters your library, emulator save states on iPhone work with zero setup. A save state snapshots the entire console at an exact frame — not just your in-game progress — so you can freeze mid-boss, close the app, and resume precisely where you were. In GamePod, dedicated SAVE and LOAD buttons sit directly on the play screen, and auto-save quietly protects your session if a phone call interrupts you or you swipe the app away.
Save states live alongside a game's original save system, not instead of it. Your cartridge-style saves behave exactly as they did on real hardware, so nothing about your file is modified. There is also a TURBO button for fast-forwarding slow sections, and everything works offline — save states never depend on a connection.
Do Emulator Apps Come With Games Included?
No — and any app claiming otherwise is a red flag. Apple's App Store guidelines allow retro emulators precisely because they ship empty: the emulator is legal software, while bundling copyrighted games would be plain infringement and would get the app removed. GamePod includes zero game files and never will. What the free download does include is the full import pipeline, the game library with cover art, and touch controls for every system; some consoles and extra features are part of an optional Pro purchase. If you see a "ROMs included" emulator anywhere, treat it the way you would treat a "free" movie site.
How to Import Your ROMs into GamePod Emu
Here is the complete flow with GamePod, from empty phone to playing — it works identically on iPad:
- Download GamePod Emu. Get Game Emulator: GamePod Emu free from the App Store (iOS 18.6+, about 161 MB).
- Move your backups to the Files app. Use iCloud Drive, AirDrop, or a USB transfer as described above, so your legally owned game files are reachable on the device.
- Pick the console. Open GamePod and flip the console switcher to the right system — Game Boy, SNES, PS1, or any of the twelve supported platforms.
- Tap Import and select your files. The Files browser opens; navigate to your folder and select one game or a whole batch at once.
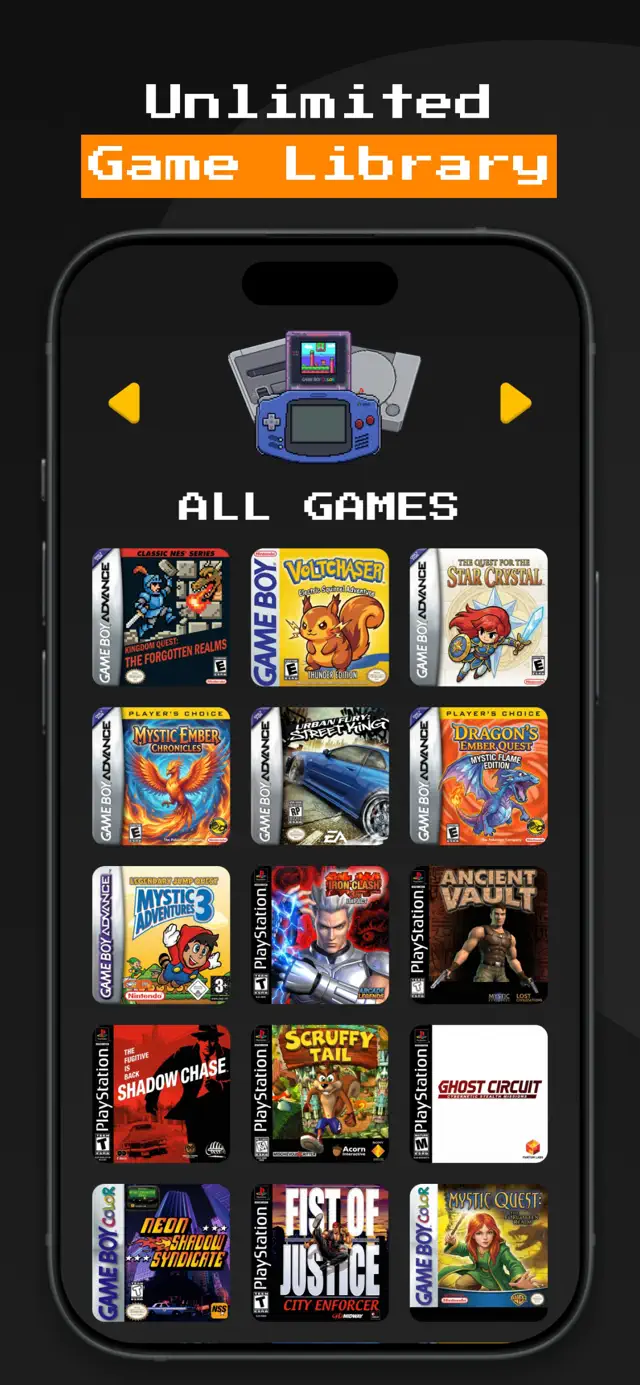
- Let the library build itself. GamePod adds each game with cover art, organized by console, so a mixed collection stays tidy without manual renaming.
- Play. Tap any title to launch it with that console's touch controller skin. Save states, auto-save, and TURBO are live from the first second, and you can pair an Xbox, DualShock, or DualSense controller whenever you like.
One honest note before you import a hundred games: how well they run depends on the system and your device. Handhelds and 8/16-bit consoles are effortless on any supported iPhone, while demanding 3D systems like N64, GameCube, and 3DS want recent hardware. Import a couple of test games first, see how they feel, then bring over the rest of your shelf.